Visiting Joshua Tree: 5 tips for better photos on your trip
All National Parks have unique aspects but Joshua Tree is unlike any other, there is no doubt which park you are visiting. Our recent trip wasn’t a dedicated photo trip, it was a day trip from nearby Palm Strings.
Normally for a dedicated photo trip, I’d be up before dawn, take a break during the middle of the day and be ready for the beautiful light at the end of the day. Joshua Tree is also a fantastic stargazing spot but unfortunately, that will have to wait until the next visit.
Since I visited Joshua Tree in the middle of the day I thought I’d share some photo tips for getting dynamic photos even if you aren’t there for the best light of the day.
Tips for taking great photos at Joshua Tree
1- Look for the iconic aspects of the park

Joshua trees are so unique, they make for an easy photo subject. In this photo, I hid the sun behind the tree to emphasize the tree’s unique shape. Lots of light reflected off the desert floor to light up the shady side of the tree facing me.
By shooting in raw format I was able to later bring out the detail in the tree and make sure the deep blue sky stayed blue.
It’s always best to shoot raw if possible so you can work with the photos later in Lightroom or Photoshop.
After your trip to Joshua Tree a stop in nearby Palm Springs is a great choice.
Redfin, the national real estate company, has quoted The Empty Nest Explorers in a great story about must-do experiences in Palm Springs. You can check out their excellent blog post here: 16 Must-Experience Activities in Palm Springs, CA
2 - Push yourself just a bit little harder

This photo came at the end of a long day of hiking. We were tired and hungry but wanted to take a short hike on Arch Rock Loop trail. This was in keeping with the above tip of photographing the iconic. The arch rock was certainly worth the hike and it was easy to see from multiple spots on the path but I really wanted to photograph someone silhoutted against the rock and deep blue sky.
I saw a group of hikers lingering in the late afternoon shade so I climbed down and was able to photograph them walking up to the arch. The photos from above would have been fine and I was ready to get dinner after a long day but I’m very glad I pushed a little harder and was able to get one of my favorite photos of the trip.
3 - Use scale to capture the size of the park

While hiking along the Hidden Valley Nature trail we spotted some people rock climbing. This was a perfect opportunity to show the size of the massive rock walls.
This climber was dressed in dark blue clothes so he was not distracting but was a perfect element to contrast against the red/orange rocks.
4 - Backlight your subject to emphasize texture
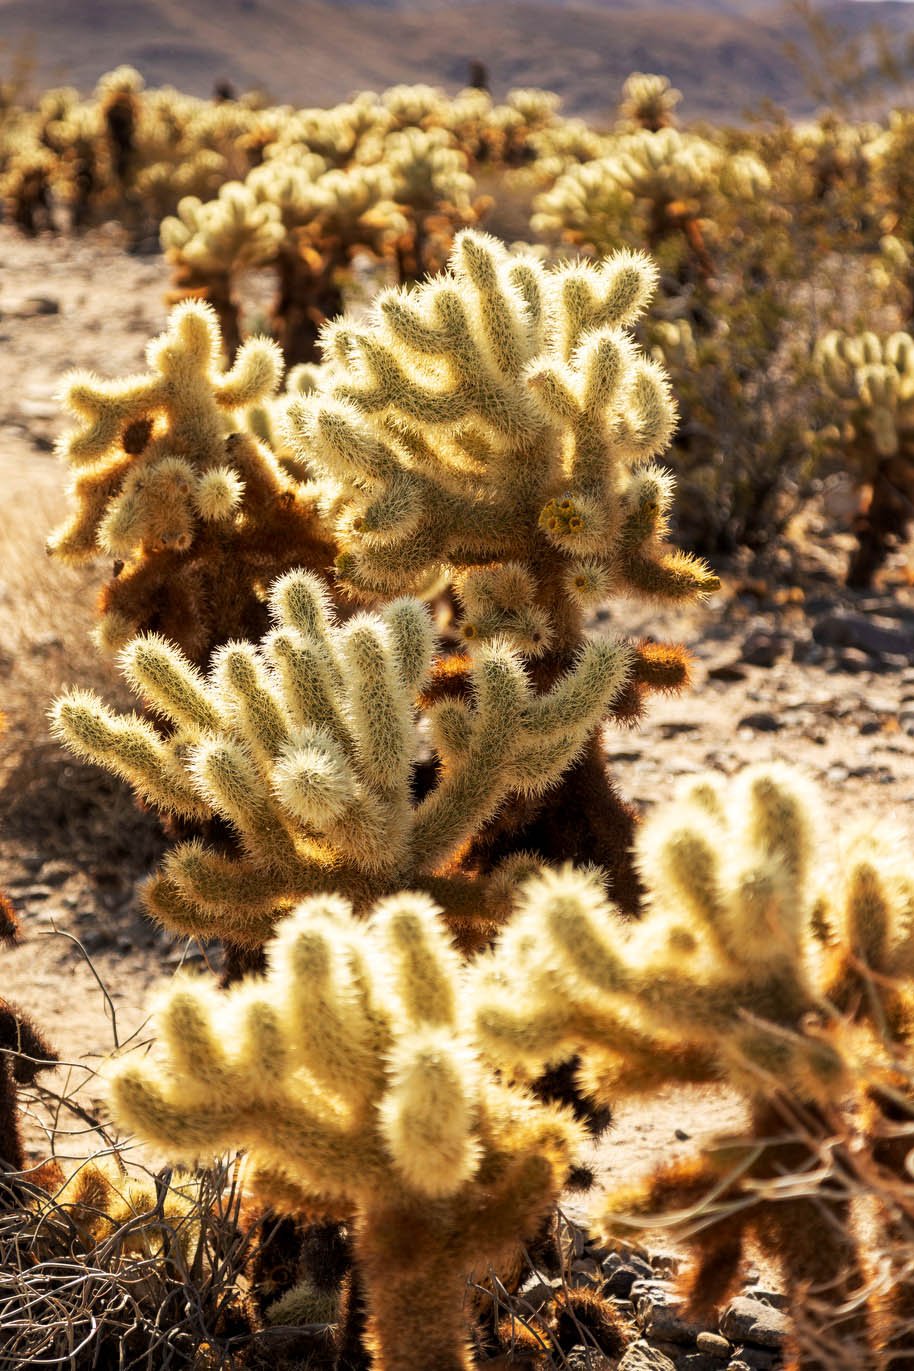
The Cholla Cactus Garden was the farthest point from the entrance to Joshua Tree that we visited but it was worth the drive. The garden is located at the merger of the upper Mojave Desert and the lower Colorado Desert.
The large spines will catch onto your skin with the slightest bit of contact so no wide-angle lenses here.
The use of a telephoto lens allowed me to visually compress the cactus and frame them so they were backlit.
The backlighting allowed me to emphasize to cactus spines and the unique shape of the plants.
There are many apps that will allow you to pre-visualize where the sun will be on any given day and location. They may be a little difficult to figure out but they really are magical, allowing you to line up the sun or moon perfectly.
One app that’s very popular is PhotoPills.
5 - Use bold shapes in your composition

Joshua Tree National Park could just as easily be called Big Round Boulder National Park. While the joshua trees are the stars of the show it’s amazing to see the overwhelming number of huge boulders in the park.
A wide-angle lens emphasized the size and shape of the boulders and a little bit of shade on the right-hand boulder added a little visual interest leading your eye through the image.
So while the timing of our visit didn’t allow for dramatic sunrise photos or iconic stargazing photos using these basic techniques I was able to walk away with a satisfying collection of photos.
If you are in Joshua Tree National Park we’d highly recommend a visit to nearby Palm Springs. You give you lots of tips on visiting Palm Springs in our post: Top things to do in Palm Springs.
This post was researched and written by John of the Empty Nest Explorers. You can learn more about the Empty Nest Explorers here.
Highly rated tours in Joshua Tree / Palm Springs
Other California travel posts you might like: